
Colourlock Fluid Leather 7 ml
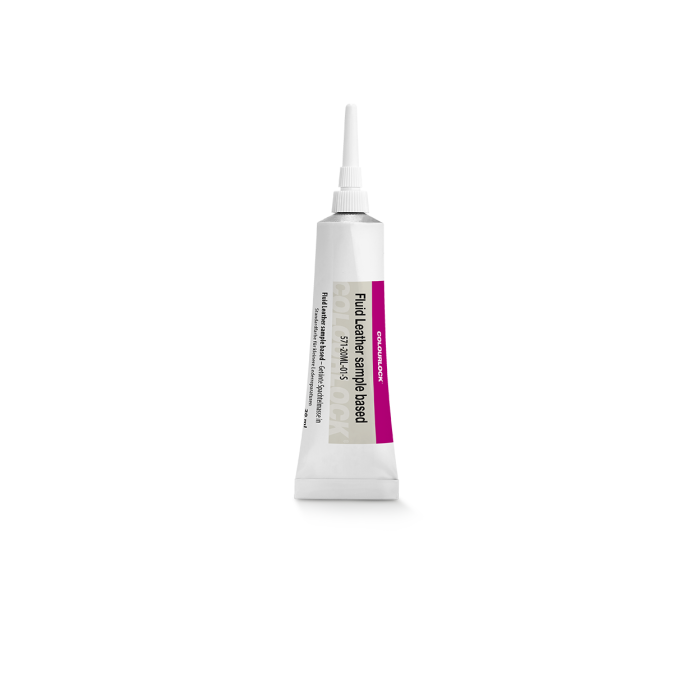
Article number: fluid7
In stock
Minor damage such as tears, holes, and deeper scratches and cracks can be quickly and easily repaired or filled with our Fluid Leather. The tinted filler retains its softness and flexibility after filling and drying.
Colour
This colour page is already prepared for the selected colour.
Select colour type
Please first select the type of colour you would like to order. We will then show you only the appropriate options.
Every screen displays colours differently. We will be happy to send you a colour chart by post that you can hold against your leather. An exact comparison with the colour chart is especially important for light colours. If none of the colours is suitable, we recommend sending us a sample. To do so, select “I would like to send a sample” above. Clicking the colour swatches displays the desired shade in the selection. Black is F034.
We have colour samples from the manufacturers listed, which we use to match your special colour. Please ask an official dealer for your brand, using the vehicle identification number, for the colour name—not the colour code. Colours from vehicle manufacturers are considered special colours. A CHF 25.– surcharge applies; processing takes approximately 7–9 business days from the order date. Satin black generally corresponds to our standard colour F034.
We have colour data from the listed manufacturers, which we use to mix your special colour. You can usually find the leather colour name in the purchase documents. For an optimal result, we recommend sending us a leather sample, especially for light or unusual shades. Colours from furniture manufacturers are considered special colours. A CHF 25.– surcharge applies; processing takes approximately 7–9 business days from the order date.
Please note that every screen displays colours differently; comparing your choice with an RAL colour fan will help you. If you are unsure, feel free to send us a sample. We mix RAL colours as special colours. A CHF 25.– surcharge applies to special colours, and mixing takes approximately 7–9 business days from the order date.
If you are unsure which colour to choose or have not found a suitable colour, feel free to send us a sample and we will mix the colour to match. Please note that special-colour mixing takes 7–9 business days from the order date before dispatch. We will contact you after receiving the sample to confirm its receipt.
You can send samples to the following address. Please clearly state your return address:
Weidmann & Sohn Lederzentrum Schweiz Tämperlistrasse 3 8117 Fällanden
incl. 8.1% VAT, plus shipping
Description
Although leather is a hard-wearing material, it shows signs of use over time – small holes, tears, deep scratches or cracks are not uncommon with regular use. Such damage does not necessarily mean costly replacement or complex professional repair. Fluid Leather allows you to repair many of these defects quickly, easily and effectively yourself. For more extensive damage, it is advisable to contact us so that we can advise you on the options and the likelihood of a successful repair using Fluid Leather.
Liquid Leather is intended for damage to smooth leather where filling is required. Scratches and signs of use that are only in the upper colour layer of the leather do not require filling with Fluid Leather. The test: Run your fingernail over the damaged area. If your fingernail catches in the cracks, you need Fluid Leather.
Application
Please read the notes below carefully before each application!
1. Clean
For visibly dirty leather, first clean the leather with Leather Cleaner mild or strong. Do not work too wet in the damaged area, as moisture penetrates there and makes the leather stiffer. For dirt in the grain, we recommend using the Leather Cleaning Brush.
2. Roughen, sand
Rough areas, scratches and crack edges must be sanded with the Sanding Pad before filling. This opens the pores of the leather and smooths the areas for repair and subsequent refreshing/concealing with Leather Fresh.
3. Degrease
The areas to be repaired must be thoroughly degreased with Leather Cleaning Spirit or Degreaser so that the repair products adhere well. This applies especially to surfaces treated with leather care products and areas of skin contact such as armrests, headrests or steering wheels.
 |
 |
4. Fill with Fluid Leather
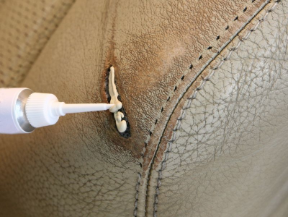
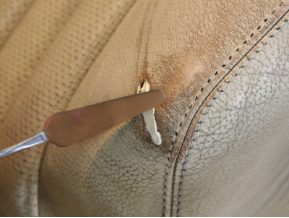
Remove the tube cap and fill the damaged areas evenly with Fluid Leather. Then immediately smooth the area with one of our spatulas and leave it to dry at room temperature – this takes an average of one to two hours. Repeat the application until the damaged area is completely filled and as level as possible.
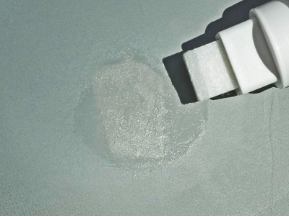
5. Smooth with the GLD Solvent Pen
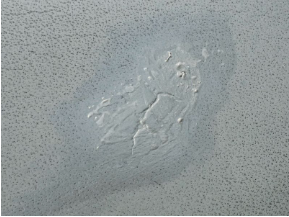
Fluid Leather cannot be sanded when dry. If the repaired area still has unevenness after treatment or is not completely clean, the GLD Solvent Pen can be used for subsequent smoothing. In most cases, however, it is not necessary. GLD dissolves the upper layer of Fluid Leather, allowing the surface to be carefully reworked. Open the cap of the GLD Solvent Pen and press the felt tip in several times so that the felt is saturated with GLD. If the felt becomes too wet, dab off the excess with a cloth. Then move over the repaired area with light pressure to dissolve and smooth the surface. Alternatively, the surface can also be smoothed with the Sanding Pad after dissolving it. Always use the GLD Solvent Pen sparingly and carefully to avoid blurring the repaired area. Allow the Fluid Leather to dry again and again in between. This allows the result to be refined step by step and reworked until the repair meets the desired requirements. An original leather grain can only be recreated by professional leather repair companies, but for minor damage this is often not necessary.
TIP: If the felt tip of the GLD Solvent Pen is dirty or worn, it can simply be pulled out and reinserted the other way around. When changing the leather colour, however, the tip should always be replaced.
6. Colour refreshment
After repair with Liquid Leather, the colour and gloss level must be adjusted with our Leather Fresh smooth-leather dyes. Dab areas requiring greater coverage several times with a thin layer of Leather Fresh, allowing them to dry with a hairdryer at a low temperature between each application.
An uneven application can be evened out with the Sanding Pad and tinted again. Our Leather Fresh dyes do not rub off!
TIP: Always order Fluid Leather and Leather Fresh together in the same custom colour so that the surcharge for the custom colour is charged only once!
7. Care
Whether cleaning, repairing or tinting/dyeing – work on leather should always be completed with care or protection.
After applying the Leather Fresh tint (step 6), wait 24 hours before applying care or protection so that the tint has sufficient time to dry.
For care, our Leather Care is the right choice; for protection, use Leather Shield.
Special cases:
Torn leather
Leather with tears longer than 2 to 3 centimetres must first be checked to see whether it would be better to replace the leather (ask us if you are unsure – contact form). In particular, repairs to brittle leather in stressed areas are not always long-lasting. First, temporarily glue small tears that are not under tension edge to edge with Leather Glue. Then thinly coat the cut or tear edges with the glue, allow it to dry for 5 minutes (this can be accelerated with a hairdryer) and press them together as firmly as possible. Then close the tear with Fluid Leather as described.
Longer tear
Longer tears and tears under tension should be reinforced from behind with Backlining Cloth. To do this, cut out the cloth in a circle so that the radius behind the tear overlaps by approx. 2 to 3 centimetres. Then hold the backing cloth in place with a needle in the middle and use a spatula to push the edge of the cloth under the leather. Apply Leather Glue all around between the cloth and leather and distribute the glue evenly. Then leave it to dry under pressure for approx. 15 - 30 minutes. Then carry out the repair work with Fluid Leather and Leather Fresh.
Notes
- Always test the product first in a concealed area for changes.
- Never apply the product directly to the leather; always apply it to the cloth or sponge first.
- Protect from frost and heat (+40 °C)
- If you are unsure, do not hesitate to contact us.